
Friday, October 1, 2010
Mac Pro Longwear Concealer Review
Labels:
Concealer


Sunday, September 19, 2010
Designer Skin Black and Xotic Xplosion
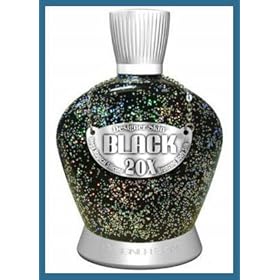
Smell: Smells like a really good Perfume mmmmmm if there was a perfume that smelled like this i would totally get it!
Type of lotion: 20x Bronzer
Bed Type: 20 min orignal bed
First off what I usually look for in tanning lotions is that they better smell amazing! And this was just about amazing! I could lather my self in this all day ahaha. It gave me a pretty even tan and I didnt burn. For a luxurious tanning experience I think this would be great for you
 Lotion: Xotic Xplosion Hot Thing
 Type of lotion: Oil
Bed Type: 12 min high powered bed with new light bulbs. The full 12
This is a tanninng oil that goes on like a lotion. It's not oily at all. It feels like a liquid lotion. The smell could be better. I believe its a tingler too. My butt was so burnt and tingling for like 15 mins after I got out of the bed. I didn't put it on my face because I was scared Id come out with a really red itchy face. All in all I didn't mind the lotion. I would use it again if I want a quick and fast tan. I'm just not a fan of it being a liquid though.
Labels:
Tanning lotions
Monday, September 13, 2010
Please do me a favor!!

Labels:
A bit of this a bit of that
Thursday, September 9, 2010
My Thoughts on Foundation
I've tried many different brands and kinds of Foundations so I just wanted to share my thoughts on them.


MAC's Compact Studio Tech Foundation.
This is a water based/powder foundation. It has a creamy consistency that glides on to the skin very well. MAC's foundations do have a strong yellow base to it. I believe I am an NC 42. After wearing it for a couple of hours it gets I dont wan't to say oily because it's not oil based but I get a dewy glow and it makes me look realll oilly. When I'm on the go or in a rush I take this out and do a quick swipe around the face. The price is $30. It's a nice foundation to keep on you at all times but then again I do my make up so I don't have to touch up at the end of the day...yeah I'm that good haha jk.. I always have to touch up my eyes.
 MAC's Studio Sculpt
This foundation gives me a very flawless look. I love it! Even tho it gets me sooo oily. I will still wear it occassionally. It's very yellow just like any other NC MAC foundations. Its gel based, supposedly water proof. I squeez it out on to my metal palette and use my stipple brush and swirl it alll over my face haha

Makeup Forever HD Foundation
This makeup can be heavy or light weight depending on how you apply it. I like to use my stipple brush on all my liquid foundations. This foundaiton is not good for people with promblematic skin it will just accentuate the problems. I like that their range of colors is very large. A little expensive. Always follow up with HD powder, makes you flawless baby. =)

You Rebel by Benefit
This is a light weight moisturizing foundation. It comes in light and medium. I actually used this from my friend and it covered my face decently and the color match was on key. I would use this on a simple day, grocery store, friends place, running errands ya know. You don't want to clog your pores everyday do you? =)

LOVE LOVE this stuff its cheap and you can layer on how thick or how light you want it. I seriously use this on everyone and my self. Its Amazing stuff. I'm a number 7 with a tad bit of 14. It's seriously all I use now. People that have dry skin make sure to moisturize realllyyyy well before using this tho because it can seep in to cracks and stay there.
This is a light weight moisturizing foundation. It comes in light and medium. I actually used this from my friend and it covered my face decently and the color match was on key. I would use this on a simple day, grocery store, friends place, running errands ya know. You don't want to clog your pores everyday do you? =)
Coastal Scents Under Cover HD Foundation
Labels:
Foundations
Thursday, August 26, 2010
Dead Body for Makeup Final

For my final in Film Makeup I had to do a dead body. My model was in a gang related shooting. I put exit/bullet hole wounds, fake tattoo, a sliced throat from a small razor and some beard stubble on him. You can't actually see it but he actually has a big ass track mark like Jared Leto in Requiem for a Dream. His body was kind of hard to work with also beacuse he had a bad ass farmers tan it was hard to mottle his skin and make him look dead not ashy on his tan skin. I wasn't too happy with the results because I knew I could have done better if I wasn't so damn nervous. He wasn't my initial model because my real model came about 40 mins late so I had to use my sisters bf as my model and I was on a time crunch.
The blood I used was $18!!!! It came in a small little bottle and its a dark blood so its best for dried up looking blood thats been exposed to air for a long period of time. The Tattoos I used were about 4 dollars each and look reallllly real! I fooled many.The bullet wounds I missed one step in the painting stage and i fucked it up badly. That's when I started to get antsy and pissed off.
The blood I used was $18!!!! It came in a small little bottle and its a dark blood so its best for dried up looking blood thats been exposed to air for a long period of time. The Tattoos I used were about 4 dollars each and look reallllly real! I fooled many.The bullet wounds I missed one step in the painting stage and i fucked it up badly. That's when I started to get antsy and pissed off.
Labels:
Dead Body Makeup
Monday, August 9, 2010
Q: How Do You Keep A Nice Tan?
A: I fake and bake! Yes its true I go to the tanning bed =( I usually go to the tanning bed a lot before a special event. Usually like two weeks before the event I would go at least 4 times. Just tanning in general I go to the beach a lot. I would sometimes go the tanning booth for the hell of it like once a month. I know there are people who are totally against tanning beds but this post will be for all the fake bakers out there!! TanningLotionSource.Com is retail tanning lotion website which sells just about every tanning lotion out there at a reasonable price. They have given me some samples to try out and I have decided to do some reviews of the different lotions I try out. I currently use Designer Skin Monarchy which is a 7x bronzer blend. It smells good and works quite well. There are times that I come out of the high powered 10 min beds using this lotion and I look "dirty" but its just the bronzer working its magic. Give it about an hour and your skin will go back to normal. That can happen to just about any lotion though. I think the most important thing I look for in a lotion is the smell and that it must have a bronzer. Tinglers tend to be too much for me. Sometimes it burns to the point where it itches!!!. Eekkk such a nasty feeling.
Each week I will review one lotion. I know its not the most accurate review because I'm using each lotion atleast once. A true review is if i used it for atleast a month and took a hiatus for a month so that my skin can go back to its original color and then switch to a nother lotion but I'm going to try my best to explain my experience with each lotion =)
Here we go...
 Lotion: Take Olive Me by Swedish Beauty
Smell: Floral and perfumey/ smells goood =)
Type of lotion: Bronzer
Bed Type: 20 min orignal bed
This product makes me feel like I'm doing something good for my skin. "Take Olive Me" contains extract from the fruit and the leaves! I can tell that it really moisturizes my skin. One thing you notice about tanning a lot is that your skin can get easily dried out. Olive oil is a natural moisturizer and its already infused in the lotion which is a huge plus. I got a nice base tan. If your going to the tanning bed every week just to maintain a nice tan I suggest this lotion.
Labels:
Tanning lotions
Thursday, July 8, 2010
Gray Blue Smokey Eye with a Brown Crease


I haven't done a look in a long time so i thought why not take the makeup I did for EDC and share with you guys how I did it.
Face ProductsMufe primer
Under Eye corrector with Benefit erase paste in medium
Concealer Ben Nye Conceal all wheel
I mixed my own color with Coastal Scents HD Foundation #7 + #14
Highlight the cheeks and forehead with a little bit concealer from MUFE no2 the pallete
Powdered with MUFE HD powder
Contour with Chocolate Soleil bronzing powder from Too Face
Blush all assortments of MAC's Sweet as Cocoa, Breezy, Fun and Games (HK collection)
Highlight MAC mineralized, Perfect Topping
--Eyes--
Lid -NYX ultra pearl Mania in Charcoal Pearl
I first blended in the crease with a stiff blending brush MAC Satin Taupe
Then with a fluffier brush over that Satin Taupe and a little above that MAC's Texture
With a pencil brush concentrate color on the outer crease brushing the color slightly in with MAC's Knight Divine
This with a stiff dome brush concentrate mainly on the outer V go in with MAC's Print to give it Depth
So the trick is to layer and blend!!!
--Lips--
MAC's Honey Love!!
My Contacts are prescripted by Acuvue Colours
ummm Lashes are from BeautyShopOC.com
Redcherry's number 107 possibly.. not positive

This was my first day's outfit I pasted the Daisy's on my self =) ahah
and I had to blur my naked sis out of the picture wooopsss
Labels:
My Many Faces
Friday, July 2, 2010
Kiss/Broadway Nails and MY FIRST CONTEST!!!
So I was contacted by Kiss because they saw my review on Broadway French Tip nails a while back. They sent me some of their new products to try out and I must say they are quite trendy .


Ok the first product is the All or One Artificial Nail Remover. The tub is filled with acetone and is seperated into 2 sections. You can either soak all your nails in the acetone or just one finger. Neat idea huh?! and through out time when the acetone gets dirty you can empty it and refill it!

These are the Fashion Diva Stickers. You get over 400 stickers in one package. I was amazed in how many there were. It's easy to apply also, just carefully peel and apply on your nail. I suggest a top coat for maximum staying power.

The first box on the left is Harajuku inspired. These comes with tabs for an easier application process. The fun part about these is that you can mixmatch the nail colors.
The second box consist of white and yellow peace signs on a pink french tip. Very cute!!
These also have tabs for an easy application process.
Both boxes come with nail glue.

These nails are pretty awesome! They have a cute design on a white french tip, but once you go in the sun they change to a pink french tip. How cool!!!


These are the Fashion Diva Express Nails. They don't come with glue just the nails itself. They also do not have tabs on them so it was a little more challenging to not get glue on my fingers.

I tried on one of the nail sets and I chose the Fashion Express's because They looked perfect for a rave I was going to =) The way I applied them was first I sized them up to my nails. Some times I had to file the edges because it didn't fit perfectly and that is okay to do. I put glue on my natural nail first and then all over the artificial nail. I push the nail down as close to cuticle first then towards the tip of my nail. Then I roll my finger over the whole nail for secure staying power. For extra security I put a drop of glue on the under side of my nail if there is a gap in between my natural and artificial. I say the more the glue the better your off. If glue spills out on to the side onto your skin thats ok when it becomes dry it will fall off after a few washes or when you rub at it.
______________________________________________________________________
CONTEST
yay! my first contest
::Rules::
1. Must be a Follower
2. Do a makeup look that compliments your nail design.
(So i want pictures of your face and nails. )
ex. You have green nails do a green smokey eye
3. One picture has to have your nails next to your face
4. Repost this Contest section on your page including your Contest Entry and make sure to link back to me
5. To notify me that you have entered into my contest reply to this Post and make sure you have a link to your website.
::PRIZE::

You get the
Fashion Diva stickers
Fashion Diva Peace sign nails
Fashion Diva Color Changing nails
Contest ENDS JULY 31
HAVE FUN!!!!
Contest ENDS JULY 31
HAVE FUN!!!!
Labels:
Broadway Nails,
Contest,
Kiss Nails
Tuesday, June 29, 2010
Sunday IMATS Pictures


Alot of people ask what school I go to so this is it. Elegance International <3

Enkore <3 Youtube makeup videos definitely played a big role in my decision in becoming a makeup artist. I found a hidden talent I never knew I had. =)


Real...sigh... I go to a makeup show and i take a picture with a guy that has nothing to do with makeup. Why was he there anyways??? ahah
For my first time at IMATS I must say I wasn't that amazed. I thought it was going to be huge and amazing. I left within 2 hours. I'll probably go next year too just to go but for 2 years I have been estatic to go to this tradeshow but I think I just hyped my hyped myself up.
Labels:
IMATS
Friday, June 18, 2010
IMATS Los Angeles June 26, June 27
I'm quite excited for IMATS coming up. Are you going?! This will be my first time going so expect me to be buying the whole place. I was thinking of going both days but I'll just be going Sunday. When I used to live in Florida I would see Youtube videos on IMATS and get so jealous of the people who went, and now I finally get to go! My top booths to go to are Naked cosmetics and Crown brushes. You can't get enough brushes. One more week guys! I can't contain my self!!! =)
Labels:
IMATS
Monday, June 14, 2010
I'm going bald.
Heyyy peepsss!! I'm now in Flim class and this will be my last course in my program =(. I graduate in July and I'm not ready to at all. I love going to school knowing im playing with makeup all day.The first thing we've learned in class was to put on a bald cap properly. It's a very difficult makeup to do. Blending the edges and mixing a perfect color to blend into the skin is very difficult for me but I managed. I was actually the class demo in the morning and this is what I looked like in a baldcap.


Labels:
bald,
Film class
Sunday, May 30, 2010
Television Makeup Final
For my Final I had to make my model age 20 years older. I used the stretch and stipple technique with Balloon Rubber latex.


AFTER
A project we had to do during our course was do a simple injury and I chose to do an abrasion. The scenario was i fell off my bike and I skidded on the ground. OUCHIE!

I like this picture because I didn't get enough sleep the night before and you can clearly tell by my under eye bags so it looks like ive been crying ahha.

Labels:
FX,
Televison makeup
Friday, May 28, 2010
Another blog?!! Wahhhhh?
Hello fellow followers. Check out my other blog xxmanduhxx.blogspot.com
That blog consist of personal bloggings and fashion.
I didn't want to mix up up personal posts and makeup posts together so now I have 2 blogs.
I thought my life has gotten a little more interesting so y not blog about it.
Okay I lie my life isn't that interesting but your more than welcome to folllow me lol.
Wednesday, May 12, 2010
My Apologies!! I'm Here!
Sorry for not updating guys!!! This will be a long post explaining where I've been and what
I've been doing for the last 2 months.
First off, I am still in makeup school. I have 2 more months!! I graduate at the end of July. I am now taking the Television/HD makeup course. This is my teacher Rick Knight doing a demo using an Airbrush. His inspiration for this was from a red frog.


 I recently participated in my schools (Elegnace International) 6th annual student competition. I was in the body painting category. I didn't win but I was very happy that i finished in time. Doing the swirls was really what took up the most time.


 So I call her Tidal Wave the Super hero =)
I've been doing for the last 2 months.
First off, I am still in makeup school. I have 2 more months!! I graduate at the end of July. I am now taking the Television/HD makeup course. This is my teacher Rick Knight doing a demo using an Airbrush. His inspiration for this was from a red frog.
I recently participated in my schools (Elegnace International) 6th annual student competition. I was in the body painting category. I didn't win but I was very happy that i finished in time. Doing the swirls was really what took up the most time. So I call her Tidal Wave the Super hero =)So what I've been doing was working on my competition. It was very stressful. I signed up for a category I've never even tried before. I had no idea how I was going to finish in time so I went in thinking I know I'm not going to win but if I finish HALLELUJUAH!!
Imats is coming up and of course I will be there getting my shop on. If any one is going let me know it would be fun meeting fellow bloggers. That Saturday after Imats I will be going to the Electric Daisy Carnival also so let me know if your going to that too!! Let's make it a party hahah.
Lately I've felt like I've lost my jive for makeup. Moving out to California has really changed me.. in a better way I must say. I guess you can say I've been having way too much fun out here and I've forgotten the reason to why I came out here in the first place. I just need to find that passion again. Maybe blogging more often will help me with that =).
Labels:
Competition,
Televison makeup
Thursday, February 18, 2010
How to: Conceal undereye circles and not look cakey

Step one::If you have dark circles we will correct that first. I like to use a yellow based corrector like Ben Nye's Mellow yellow in normal. What is usually recommended is a pink based corrector like Benefits Erase Paste. I like Ben Nyes corrector because its a lot more pigmented and I have quite noticeable dark circles.

Step Two:: This shows the placement of where to put your corrector. It should go right under the fatty pocket under your eye. If you smile you can tell where this fatty pocket is located. With the corrector on your brush use the tip of the brush to place it under the fatty pocket. Don't use the flat side of your concealer brush. Then with your finger tap the corrector around the pocket to blend Do Not wipe. If you feel that he consistency of your corrector is to thick for you use a smidge bit your moisturizer to thin it out. If you dont have dark circles and is content with just normal concealer skip to next step.
 Step Three:: Use a concealer that is he same color has your skin. I use a cream concealer but if you are concerned with cakeyness again mix it with just a little bit of moisturizer. A liquid concealer would be great too.
 Step Four:: This shows the placement of your concealer. This time you can go up to the lash line. If your concealer is a little light for you and you go up to the lash line that fatty pocket could seem to look bigger so make sure it matches ur skin. Its kind of like the theory of high lights and shadows. If you highlight something that is already standing out it will be even more noticeable. That is why the corrector goes under the fatty pocket not over it. You don't want to look like you have really round fatty eyes do you? lol
Step Five:: Conceal blemishes and Foundation
Labels:
Conceal dark circles
Saturday, January 30, 2010
Makeup Forever Seminar at Nigels and My first LUSH product!
 Yesterday I attended the Makeup Forever student Seminar held at Nigels and was instructed by Kevin James Bennett. I learned sooo muchhh!! Mostly about the world of HD. As much as I love MUFE I always thought there are other products I could use that are cheaper and can do the same thing. I was totally wrong Makeup Forever products are specially formulated and you are definitely getting what you pay for. For example lets say the Smokey Lash waterproof mascara. I can get water proof mascara anywhere and as we all know wearing water proof mascara everyday isn't really good for your lashes, well the Smokey Lash is formulated so you can wear it every day and it won't ruin your lashes. It also is the blackest of the blackest mascaras out there. Dior show is the blackest of black mascaras on the market and Mufes Smokey Lash was made in the Dior factory or someting like that lol. I love Make up forever so much I just might have to save up for the whole makeup line.
I always said I'd never fall on the Lush bandwagon but I went in there and saw a heart shaped glittered soap bar. I do like there bath bombs and fizzes and all but my bath tub isn't big and I wouldn't feel comfortable laying in it. Only if I was back home in florida with the jacuzzi =*(

Labels:
Lush,
Seminars MUFE
Saturday, January 16, 2010
I'm going back on Youtube..
I totally made a new video on my new digi cam because it records HD videos but my Windows movie maker won't let me edit it because it's not compatible with HD videos. It says it's missing a CodeC????? If anyone has come across this please help me because I would love to use this camera if not I'll just have to go back to my old one.
I definitely don't know what videos to do anyways so please leave a comment for any request on certain looks, nail tutorials, update on any of my daily routines, whateverrr.
In the mean time I I'll show you some of the projects I've done in class
I definitely don't know what videos to do anyways so please leave a comment for any request on certain looks, nail tutorials, update on any of my daily routines, whateverrr.
In the mean time I I'll show you some of the projects I've done in class

The project was to do a makeup design for a computer company. The makeup should be futuristic like or it should be based on computers.

For this project we had to make a makeup design based on a sorceress. I made the lashes by curling single hairs of feathers and gluing them the shaft of the lashes.
Subscribe to:
Posts (Atom)